Embroidering books can seem tricky and scary, especially if you’re worried about messing up your favorite books.
It’s easy to think you might make mistakes that could damage the cover or spine, but with the right steps, you can turn your books into beautiful art.
But don’t worry! This guide on how to embroider books is here to help. . We’ll talk about the basic supplies you need and show you simple stitching techniques.
You’ll learn how to make your books look special and personal. Follow these steps to add a unique touch to your collection.
Trust this guide and start making creative book covers today!
Key Takeaways
- Starting book embroidery only requires six essential supplies.
- A 6-inch embroidery hoop is ideal for most projects.
- For even stitching, separate 2 or 3 threads from your embroidery floss.
- Cut your thread to about the length of your arm for manageable stitching.
- Use the hashtag #ourdailycraft to share your embroidered books on Instagram.
- 20 botanical-inspired projects provide ample inspiration.
- Regular visits to our embroidery guide can help improve your skills.
Introduction to Book Embroidery
Book embroidery is a mix of two great things: the old skill of embroidery and the charm of reading. It involves drawing on book covers, spines, or even pages with beautiful designs. This craft has become really popular, turning plain books into stunning artworks. If you love both books and sewing, you’ll find joy in the world of book art with embroidery.
What is Book Embroidery?
Book embroidery means adding stitched designs to a book’s parts. You can decorate the cover, the spine, or inside pages. It uses simple to complex stitches to make books special. You can make your books unique by embroidering them, making them your own keepsake.
The Art and Craft of Embroidering Books
This art is not just about pretty stitching but also telling stories with thread. Books like “Mary Thomas’s Dictionary of Embroidery Stitches” and “Creative Stitches for Contemporary Embroidery” are great for learning. They guide you through different stitches and inspire your creativity.
If you’re new to this, start with guides like “Hand Embroidery Stitches for Everyone” by Juby Aleyas Koll. It gives you a solid beginning. There are also books for left-handed people, like “Left-Handed Embroiderer’s Companion” by Yvette Stanton. Everyone can enjoy this craft.
Book embroidery is very creative. You might want to make a special cover for your favorite book. Or maybe you’d like to add your personal touch to a diary. There are many resources to help you, like Trish Burr’s needle-painting books or Susan Brandeis’s “The Intentional Thread.” These can make your art even more beautiful.
| Book Title | Author | Published Year | Publisher |
|---|---|---|---|
| Creative Stitches for Contemporary Embroidery | Sharon Boggon | 2020 | C&T Publishing |
| Mary Thomas’s Dictionary of Embroidery Stitches | Mary Thomas (revised by Jan Eaton) | 1934, revised in 2018 | Search Press |
| Left-Handed Embroiderer’s Companion | Yvette Stanton | 2010 | Vetty Creations |
| The Embroidery Stitch Bible | Betty Barnden | 2017 | Search Press |
| Hand Embroidery Dictionary | Christen Brown | 2021 | C&T Publishing |
| Hand Embroidery Stitches for Everyone | Juby Aleyas Koll | Updated in 2021 | — |
| The Intentional Thread | Susan Brandeis | 2019 | Schaffer Publishing |
Necessary Tools and Materials
Starting to embroider books is fun but needs the right things. You need to pick the best fabric. Then find the right needles and threads. Each part is super important for how your embroidery will look.
Choosing the Right Fabric
For those just starting, pick 100% cotton. It’s easy to work with and bends well. If you’re making book covers, you want tough fabric. It will make your work strong and pretty.
Embroidery Needles and Threads
There are many kinds of needles and threads for embroidery. You must match them right. Use the right needle for the thread. A good thread for beginners is 100% cotton floss. It comes in many colors and is easy to pull apart. The brands DMC and Anchor have lots of colors and types to try.
Additional Supplies
Extra tools can make your embroidery even better. Hoops are important. They keep your fabric tight while you sew. Use fabric stabilizers to avoid wrinkles. Water erasable pens help you draw on the fabric. Then there are frames, lightboxes, and more to pick from. They make things easier for different people.
Getting helpful accessories like threaders and organizers is smart. They make sewing more fun and faster. Using new tools can make your work look pro. This is good for your book covers or any embroidery projects.
Selecting Your Book
Choosing the right book for your embroidery project is key. Hardcover and paperback books are common choices. Each one is good for different reasons when it comes to adding embroidery.
Hardcover vs. Paperback
Deciding between hardcover and paperback books is important for embroiders. Hardcover books are firm, making it easier to embroider detailed patterns. This is because their firmness aids in maintaining stitch tension.
Meanwhile, softcovers are lighter and bend easily. They can work well for easy or starting designs. Yet, you must be gentle with them to avoid cover damage while embroidering.
| Book Type | Advantages | Considerations |
|---|---|---|
| Hardcover | Sturdy surface, maintains tension | Heavier, more rigid structure |
| Paperback | Flexible, lightweight | Prone to damage, less tension |
Preparing Your Book for Embroidery
Now that your book’s chosen, let’s get it ready for embroidery. This simple guide will help keep your book in shape:
- Start by cutting the front and back covers to the size of 3 1/4” x 4 1/2”.
- Design your elements, such as a four-leaf clover with gold paint, and stitch them individually to give each leaf distinction.
- Utilize back stitch method for the embroidery, keeping stitches approximately 1/16″ apart around shapes or letter lines.
- Use gold glitter paper for the inside covers, sized to match the outer paperboard covers. Cut filler paper to 3 1/8″ x 4 3/8”.
- Mark lines on the back cover at 3/16″ and 3/8″ from the edge, and spot holes along those lines for the book binding with embroidery.
- Follow the binding process by marking hole spots, stacking book contents, poking holes, stitching through the marked spots, and tying knots tightly in the center.
- Trim thread ends to 1/2″ in length for a neat finish.
The steps may look hard, but they’re easy and fun to do. Just be careful with the details and use the right methods for a great and lasting project.
Basic Embroidery Techniques for Books
Starting book embroidery is a fun journey. You begin with simple stitches. I will teach you easy stitches and show you silk ribbon techniques.
Stitches to Start With
First, learn basic stitches for book embroidery. The running stitch is easy. The backstitch makes clean, solid lines. Try these:
- Running Stitch: Perfect for straight lines and basic outlines.
- Backstitch: Ideal for precise and continuous lines.
- Chain Stitch: Adds a decorative element with its linked loops.
- French Knot: Great for dotted patterns or adding texture.
- Satin Stitch: Provides a solid, filled-in effect.
“Embroidery: A Step-by-Step Guide to More than 200 Stitches” by DK Publishing is a great book. It shows over 200 stitches.
Working with Silk Ribbon Embroidery
Silk ribbon embroidery makes books more beautiful. It makes floral designs stand out. “A-Z of Ribbon Embroidery” is a key guide for this beautiful craft.
Learn these silk ribbon stitches:
- Ribbon Stitch: Creates small, petal-like designs perfect for flowers.
- Lazy Daisy: Ideal for simple floral motifs, enhancing book covers.
- French Knot with Ribbon: Adds texture and dimension.
Silk ribbon embroidery combines well with other stitches. “Thread Folk: A Modern Makers Book of Embroidery Projects” has modern designs using silk ribbon.

| Book Title | Edition | Price (USD) |
|---|---|---|
| A-Z of Embroidery Stitches | 2014 reprint | $19.95 |
| A-Z of Ribbon Embroidery | 2016 reprint | $19.95 |
| Goldwork Embroidery: Designs and Projects | 2007 edition | $24.95 |
| Essential Stitch Guide: Whitework | 2021 reprint | $19.95 |
Whether you’re using basic or silk ribbon techniques, there are many guides to help you. Enjoy your embroidery journey!
Designing Your Embroidery Pattern
Making special book embroidery patterns is key in this art. Start by thinking of ideas that fit your style and the book’s topic. Abstract embroidery lets you be creative. You can try different colors, textures, and stitches. This helps make your design really show your imagination.
Don’t forget about the tools that can help you make embroidery designs. Programs like Photopad Embroidery Design Software can turn your ideas into patterns. Also, you can use self-adhesive water-soluble stabilizers.
These are thin and can be printed on. This means you can easily move your design onto fabric. EGA members get lots of design ideas and Study Boxes. These are great for finding new pattern ideas.
When making your design, planning the stitches is key. Starting with simple stitches is good for new designers. If you want to get better, EGA has online classes. They teach different styles, like Sashiko and adding texture to designs.
Here are some helpful tools and resources:
| Tool or Resource | Description |
|---|---|
| Photopad Embroidery Design Software | Allows for creating customizable, printable patterns. |
| Self-adhesive Water Soluble Stabilizers | Enables direct printing of designs onto fabric stabilizers. |
| EGA Lending Library | A vast collection of inspiring designs and patterns for tracing. |
| Abstract Embroidery Techniques | Encourages the use of colors and textures for unique designs. |
Designing can be a calming process. Charles and Elin talk about this in their book. They highlight mindful embroidery as a way to chill and feel more in tune with yourself. Their book includes drawings based on European buildings. They offer clear steps that make designing fun for everyone.
How to Embroider Books: Step-by-Step Guide
Starting book embroidery might seem hard at first. With a good plan and the right help, it’s fun and rewarding. This guide will show you the key steps. You’ll learn to turn your books into special art pieces.
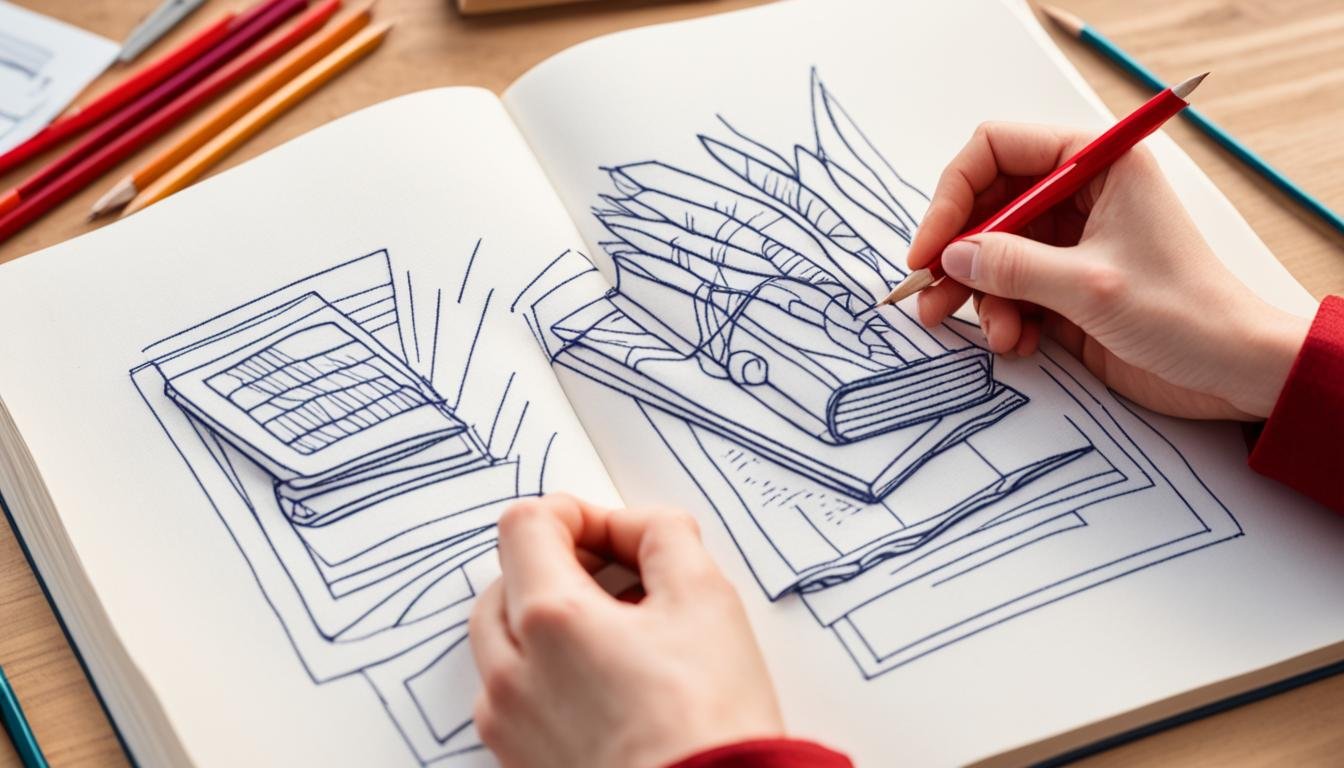
Drawing Your Pattern
First, draw the pattern for your embroidery. Pick a design that fits your book’s theme. Use a soft pencil or fabric marker to sketch the design. Need drawing tips? Check “The Intentional Thread: A Guide to Drawing, Gesture, and Color in Stitch” by Susan Brandeis for ideas.
Starting with Simple Stitches
It’s important to start simple. Learn basic stitches like the backstitch or running stitch. They’re the foundation for many designs. Books like “Stitchcraft: An Embroidery Book of Simple Stitches and Peculiar Patterns” by Gayla Partridge are great for learning.

For a lot of stitching techniques, try “Embroidery: A Step-by-Step Guide to More than 200 Stitches” by DK Publishing. It makes starting easy with clear steps.
Advanced Embroidery Techniques
After basics, try more advanced stitches. “The Embroidery Stitch Bible” by Betty Barnden offers 200 stitches with simple charts to follow.
“Hand Embroidery Dictionary” by Christen Brown has over 500 stitches. It helps you add complex details to your books. Looking for specific styles? Check “A-Z of Goldwork with Silk Embroidery” and “Creative Stitches for Contemporary Embroidery” by Sharon Boggon for in-depth guides.
With these tools, you’ll make beautiful, unique book covers. This guide is for everyone, from beginners to experts. It promises great results and a good embroidery experience.
Embroidering Book Covers
Changing a plain book cover into a work of art is joyful. It captures the eye and the heart. All it takes is a bit of creativity and close attention to make beautiful, lasting book covers through embroidery.
Design Ideas for Covers
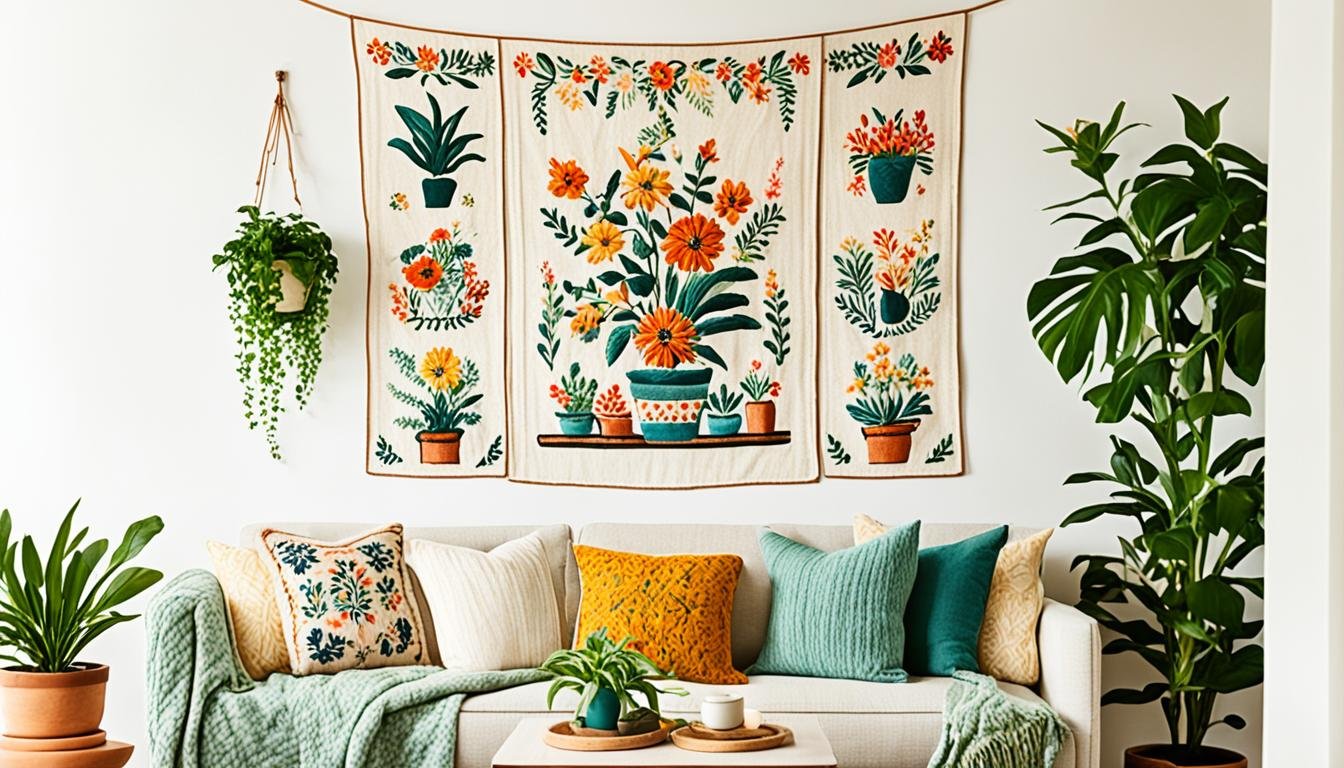
When you think of designs for embroidered book covers, consider what look you’re going for. Do you like simple elegance or bold beauty? You might pick from designs like flowers, shapes, or your own initials. Or, you could make patterns that match the book, using images or words from its story.
Practical Tips and Tricks
- Precision: Be very precise – use graph paper to get the measurements spot on.
- Fabric Handling: Stretch your fabric after washing to get rid of wrinkles and make it smooth.
- Neaten the Edges: Always cut off the extra fabric close to the stitching for a tidy look.
- Wonder Clips: These clips by Clover can keep your work in place, making sewing easier.
- Securing the Cover: Use a whip stitch with white thread to sew your cover tightly onto the book.
- Color Choices: Pick your colors carefully. Sometimes, less is more and choosing fewer can make a design better.
With these steps and tricks, your embroidery will be not just nice to look at. But also strong and lasting. Whether it’s for a gift or just for you, handmade covers always bring joy.
| Step | Detail |
|---|---|
| 1. Prepare Your Fabric | Cut fabric bigger than the book, to wrap around it. You can stain it with tea for a vintage look. |
| 2. Embroider Your Design | Stitch your design carefully, making sure it looks even and neat. |
| 3. Trim and Sew | Cut off extra fabric, then wrap it around the book and sew it very well. |
| 4. Final Touches | You can make it fancier by painting the edges with gold or other shiny colors. |
Embroidered Book Spines
The book spine is key for embroidery projects. Embroidery on old books makes them unique. Adding embroidery to the spine makes each book special. It also makes them feel different.

Working on the spine shape is tricky but doable. Begin by picking the right materials. Get 1/2 yard of quilters cotton or twill for the pages. Also, get 1/3 yard for the cover.
Add 1/4″ – 1/2″ grommets and 42″ yards of leather lacing for binding.
Setting up for embroidery needs folding and stitching space. Use a 7 1/2″ x 7 1/2″ square for a starting point. This size and shape make the process easier. It keeps the spine flexible, which is important.
To embroider books, remember these steps:
- Seam Allowance: Sew a 1/4″ seam on the sides, leaving the spine side open for turning.
- Grommets or Eyelets: Add these to the pages and cover for secure assembly.
- Leather Lacing: Thread this through the grommets in a pattern to bind the book together.
Looking for a clean look? Follow advice from blogs like “BOOKMAKING 110: THE GRAND FINALE”. They talk about finishing touches. This includes mounting the cover and handling thread ends.
They give tips on centering, design borders, and color choices too.
Need a materials cheat sheet? Here you go:
| Materials | Measurements |
|---|---|
| Quilters Cotton or Twill | 1/2 yard for 4 pages, 1/3 yard for cover, 1/3 yard for lining |
| Grommets or Eyelets | 1/4″ – 1/2″ |
| Leather Lacing | 42″ yards (two colors) |
| Final Project Size | 10″ x 9″ |
| Front Page Square | 7 1/2″ x 7 1/2″ with 1″ x 7 1/2″ allowance |
Embroidered book spines make old books unique. They add your touch to them. This way, even old books become beautiful. They are great for showing off on your bookshelf.
Adding Embroidery to Book Pages
Adding embroidery to book pages makes stories more fun and books special. You use different stitches and patterns on the pages. This turns them into art you can touch and play with.
Start by picking the right embroidery patterns. I like vintage looks from 1889. My designs have red berries, hedgehogs, pine branches, and grass. It makes the pages look nature-friendly and lovely.
You need white Perle Cotton thread (no. 5) for a soft feel. Use stitches like outline, split, and back stitches. Also, do satin stitch, lazy-daisy, French knots, and straight stitches. These make each design clear and pretty.
It’s important to make the book strong. So, put fusible interfacing on the covers. This helps with the extra weight of stitches.
Add a ribbon to close or open the book easily. It makes adding more pages simple. A spine made with plastic canvas keeps everything in place.
A guide on making books can be found here.
Add things like tea cups, stacks of books, and quotes to make your book personal. These details make the book look nicer and feel friendly to read.
Embroidery in books turns them into something special. It makes reading feel like a shared adventure. Whether you’re learning or good at it, embroidering books is fun. For more ideas, check out this resource.
| Book Specifications | Details |
|---|---|
| Total number of pages | 200 |
| Book size | 8” x 9” |
| Number of sheets | 25 sheets of 8.5″ x 11″ |
| Number of signatures | 5 |
| Fabric for pocket | 9″ by 6.5″ |
| Plastic canvas for spine reinforcement | 5.75″ long |
| Felt for book cover | 6″ x 13.5″ or 6″ x 9″ AND 6″ x 4.5″ |
Embroidering book pages mixes art and stories. It makes books that are interesting to look at and touch. Stories seem more real when made with needle and thread.
Maintaining and Caring for Embroidered Books
Handcrafted books often have beautiful embroidery on them. They need extra care to stay looking nice. You should clean them well, store them safely, and fix tears or loose threads. I’ll help you learn how to keep your embroidered books in great shape.
Cleaning and Storing Your Embroidered Books
First, let’s talk about cleaning. Don’t use bleach; it can ruin the colors and fabric. Use Biz on tough stains for white fabric. Cream of tartar mixed in boiling water helps with really stubborn stains.
Drying is important too. Lay them flat or hang to dry. But never use a dryer. Iron gently with a cloth over the embroidery. This keeps the stitches looking neat. Don’t rub too hard.
For storage, never fold your books. Lay them flat or roll them on acid-free tubes. Don’t use plastic for storage. Choose archival cardboard boxes or well-lined drawers instead.
Repairing Damaged Embroidery
Check your books often for any damage. It’s best to fix small problems early. Wool or silk items should be cleaned by a pro. This avoids shrinking or fading.
For hard stains, like rust, treat them carefully. Before washing redwork, test for color bleeding. Press your work while damp. This keeps it looking sharp.
Follow these steps to take good care of your embroidered books. With care and attention, they will last a long time.
Embroidered Books as Gifts
Creating an embroidered book cover makes books special. It’s a great gift for any time. A custom design shows you care greatly.
It can be a unique birthday present or given on any day to show you care. Custom embroidery makes it more personal.
Personalized Book Embroidery Ideas
Embroidery on books has endless options. You can put initials or special designs on it. This makes the gift perfect for the person.
Here are some ideas:
- Monograms: A classic and elegant touch to any book cover.
- Favorite Quotes: Embroider a cherished quote or a meaningful message.
- Thematic Designs: Reflect the book’s content or the recipient’s interests, such as florals for a gardening book or nautical themes for a travel journal.
- Symbols and Icons: Emblems or icons that hold special meaning to the recipient.
Presentation and Packaging
How you wrap and present the book is important. It adds to the specialness of the gift. Here are some tips:
- Gift Wrapping: Use high-quality wrapping paper that complements the book’s color scheme. Adding a ribbon or bow can make it even more special.
- Gift Boxes: Consider presenting the book in a decorative box. This not only adds an element of surprise but also provides a safe place to store the book.
- Handwritten Notes: Include a handwritten note or card explaining the significance of the embroidery design. This personal touch can make the gift even more meaningful.
These small details turn a book into a special, cherished gift. It makes the recipient feel loved and appreciated.
Conclusion
We’re wrapping up our adventure in book embroidery. I hope you found joy and beauty in this craft. Choosing the best materials and learning various skills in embroidery is fun. Every project shows how patient and creative you are.
The Embroiderers’ Guild of America works hard to keep this art alive. Books like “How to Embroider Books: A Crafty Guide” and “A Little Book of Embroidery Basics” are great for learning. They teach you how to keep your work neat and lasting.
Want to try historic stitching ways? Gail Marsh’s book “18th Century Embroidery Techniques” can help. Making gifts with embroidery shows you care. Remember, it’s not just stitching; it’s telling your story. Keep making beautiful pieces and growing your art.
FAQ
What is book embroidery?
Book embroidery enhances book covers, spines, or pages with stitched patterns. It makes books into special art pieces. This method combines embroidery with love for reading.
What materials do I need for book embroidery?
Supplies include fabrics that work with your design, different needles, strong threads, hoops, and stabilizers. The materials depend on your book’s type and the design you pick.
Can I embroider both hardcover and paperback books?
Yes, you can work on both. Hardcovers are sturdy, and paperbacks more flexible. Each choice affects how your project turns out.
What are some basic stitches to start with?
Start learning with backstitch, chain stitch, and running stitch. They are simple and set the stage for more detailed work.
How can I create my own embroidery pattern?
First, draw your design for the book cover. Think about its size. Then, use a fabric pen or tracing paper to put your design on the book’s fabric. Make it yours to show your style.
What are some advanced embroidery techniques for books?
Once you know the basics, try silk ribbon embroidery or goldwork. They add special textures and looks to your embroidery.
How can I ensure my book retains its structure during embroidery?
Ready your book right. Use stabilizers and hoops to keep the fabric in place. Also, be careful with your stitches to keep the book safe.
What are some design ideas for embroidered book covers?
Try nature themes, geometric shapes, or unique initials. Plan your design around the book’s topic or the reader’s interests for a deep connection.
How do I add embroidery to the spine of a book?
To sew the narrow spine, use a needlebook for accuracy. With tiny titles or patterns, the spine can be a lovely part of your design.
Can I embroider on the pages inside the book?
Yes, placing embroidery on book pages can make stories more interactive. Use light threads and simple stitches to keep your book safe.
How should I care for my embroidered books?
Keep them in a dry, cool spot out of the sun. Dust gently with a soft brush. Fix any torn stitches quickly to keep them beautiful.
Are embroidered books good gifts?
For sure! Personal stitches make your gift stand out. Think about what the person loves. This makes your gift truly remembered.