Hemming lace can be tricky, but it’s worth it for a beautiful finish. Lace is delicate and needs special care. In this guide, you will learn how to hem lace with simple steps.
We will show you different ways to hem lace that are easy to follow. You don’t need to be an expert to get a perfect lace hem. With the right tools and a bit of practice, you can hem lace like a pro.
Let’s start with the basics and move on to the best methods to make your lace projects look great.
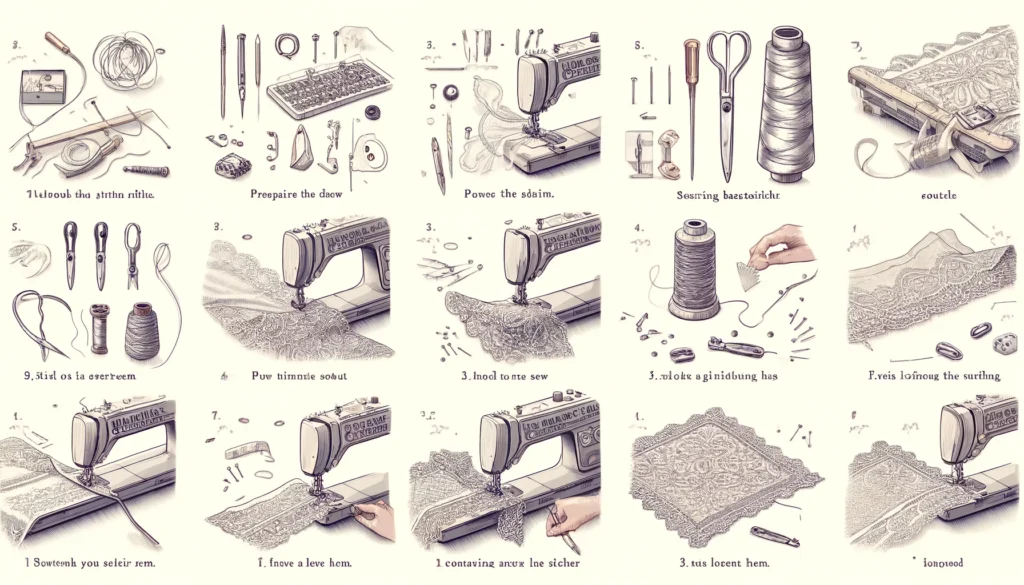
Tools and Materials Needed
To hem lace, you need some tools and materials. Here’s what you’ll need:
- 1. Fine Needles: These help you sew through the delicate lace without causing damage.
- 2. Sharp Fabric Scissors: Use these to cut the lace cleanly and accurately.
- 3. Hem Tape: This is great for quick, easy hems. It works well with straighter hems and lace with fewer holes.
- 4. Bias Binding: Useful for creating a clean, finished edge.
- 5. Matching Thread: Choose a thread that matches the color of your lace to keep stitches invisible.
- 6. Pins: These hold the lace in place while you sew.
- 7. Iron: Use this to press the hem and remove wrinkles.
- 8. Measuring Tape: Essential for measuring the hem accurately.
- 9. Sewing Machine (optional): Handy machine sewing techniques.
Preparing Your Lace Fabric
Step 1: Wash the Lace: Gently wash the lace to remove any dirt or starch. Use cold water and mild detergent. Let it air dry to avoid damage.
Step 2: Iron the Lace: Once dry, iron the lace to remove wrinkles. Use a low heat setting. Place a pressing cloth over the lace to protect it from direct heat.
Step 3: Mark the Hemline: Use a measuring tape to measure the length of the hem. Mark the hemline with a tailor’s chalk or a fabric marker. Make sure your marks are clear but light.
Step 4: Cut the Lace: Carefully cut the lace along the marked hemline using sharp fabric scissors. Follow the lace pattern to avoid damaging the fabric. Cutting along the design helps maintain the lace’s delicate look.
Step 5: Pin the Hem: Fold the hem up to the marked line. Secure it with pins to keep the lace in place while you sew.
Step 6: Stabilize if Needed: If the lace is very delicate, you might want to use a stabilizer. This helps keep the lace in shape while you sew.
How To Hem Lace? 4 Easy Methods Proven By Experts!
Method 1: Using Hem Tape
Step 1: Cut the Hem Tape: Measure the length of the hemline on your lace fabric. Cut a strip of hem tape to match this length. Make sure the tape is the right width for your hem.
Step 2: Position the Hem Tape: Place the hem tape on the wrong side of the lace along the raw edge. The hem tape should cover the entire length of the hem.
Step 3: Iron the Hem Tape. Follow the instructions on the hem tape package. Generally, you will need to iron the tape onto the lace. Set your iron to a low heat setting and press the hem tape onto the lace, moving the iron slowly to ensure the tape adheres well.
Step 4: Fold the Hem: Fold the raw edge of the lace up to the width of the hem tape. The hem tape will help guide the fold. Make sure the fold is even along the entire hemline.
Step 5: Press the Hem: Use your iron to press the folded hem in place. This will activate the adhesive on the hem tape, securing the lace in position. Ensure the entire hem is properly pressed and stuck together.
Step 6: Sew the Hem: To reinforce the hem, sew a straight stitch close to the folded edge. Use matching thread to keep the stitches invisible. Sew slowly and carefully to maintain an even stitch line.
Step 7: Final Press: Once you have sewn the hem, give it a final press with the iron to ensure it lies flat and smooth. This will also help secure the stitches and hem tape.

Method 2: Hand Stitching with a Slip Stitch
Step 1: Prepare Your Needle and Thread: Choose a fine needle and lightweight thread that matches the color of your lace. Thread the needle and tie a small knot at the end.
Step 2: Fold the Hem: Fold the lace up to the desired hemline. Make sure the fold is even all the way around. Pin the fold in place to keep it secure.
Step 3: Start Stitching: Begin stitching from the inside of the lace fabric. Insert the needle into the folded edge and bring it out through the lace, making small, even stitches. The slip stitch should catch just a few threads of the lace to remain nearly invisible.
Step 4: Continue Stitching: Work your way along the hem, stitching close to the folded edge. Keep the stitches small and evenly spaced. Pull the thread gently to avoid puckering the lace.
Step 5: Secure the End: When you reach the end of the hem, make a few extra stitches in one spot to secure the thread. Tie a small knot and cut off the excess thread.
Step 6: Final Press: Gently press the hem with a low-heat iron to set the stitches and flatten the hem. Use a pressing cloth to protect the lace from direct heat.
Pro Tip:
Practice on a scrap piece of lace before starting on your garment. This will help you perfect your technique and ensure a smooth, professional finish.
Hand stitching with a slip stitch is ideal for delicate lace fabrics and wedding dresses. It gives a seamless finish that blends into the lace, making the hem nearly invisible.
Method 3: Machine Stitching Techniques
Step 1: Prepare Your Sewing Machine Set up your sewing machine with a fine needle and lightweight thread that matches your lace fabric. Adjust the thread tension to a lower setting to avoid puckering the lace.
Step 2: Fold the Hem Fold the lace up to the desired hemline. Make sure the fold is even, and secure it with pins along the edge. This will keep the lace in place as you sew.
Step 3: Start Stitching Begin sewing at one end of the hem. Use a straight stitch and sew close to the folded edge. Keep the stitches small and even. Sew slowly to maintain control and ensure accuracy.
Step 4: Use Backstitching At the beginning and end of your stitching, use a backstitch to secure the thread. This will prevent the stitches from unraveling. To backstitch, sew a few stitches forward, then reverse and sew over them again.
Step 5: Continue Sewing Sew along the entire hemline, keeping the stitches close to the folded edge. Adjust the fabric as needed to keep it flat and smooth. Remove pins as you go to avoid sewing over them.
Step 6: Final Press Once you have finished sewing, press the hem with a low-heat iron. Use a pressing cloth to protect the lace from direct heat. This will help set the stitches and give the hem a neat finish.
Pro Tips:
- Adjust the thread tension before starting. Test on a scrap piece of lace to find the right setting.
- Use a lightweight thread that matches the lace to keep the stitches invisible.
- Sew slowly to ensure control and precision.
Machine stitching is suitable for less intricate lace patterns. It is a quick method that provides a durable hem.
Method 4: Using Bias Binding
Step 1: Choose Your Bias Binding: Select a bias binding that matches or complements your lace fabric. Bias binding is a strip of fabric cut on the diagonal, which makes it flexible and great for curved hems.
Step 2: Prepare the Lace Fabric: Fold the lace up to the desired hemline and pin it in place. Ensure the fold is even and smooth. This will make it easier to attach the bias binding.
Step 3: Attach the Bias Binding: Place the bias binding along the raw edge of the lace, with the right sides together. Pin the binding to the lace, making sure it covers the raw edge completely.
Step 4: Sew the Bias Binding: Using your sewing machine, sew the bias binding to the lace along the pinned edge. Sew slowly and carefully to keep the stitching even. Use a straight stitch and matching thread for a clean look.
Step 5: Fold and Press: Fold the bias binding over the edge of the lace to the wrong side. Press it flat with a low-heat iron. This will create a smooth, finished edge.
Step 6: Topstitch the Binding: From the right side of the lace, sew a topstitch close to the folded edge of the bias binding. This will secure the binding and give the hem a neat finish. Remove any pins as you sew.
Step 7: Final Press: Press the finished hem with a low-heat iron. Use a pressing cloth to protect the lace from direct heat. This will help set the stitches and ensure a professional look.
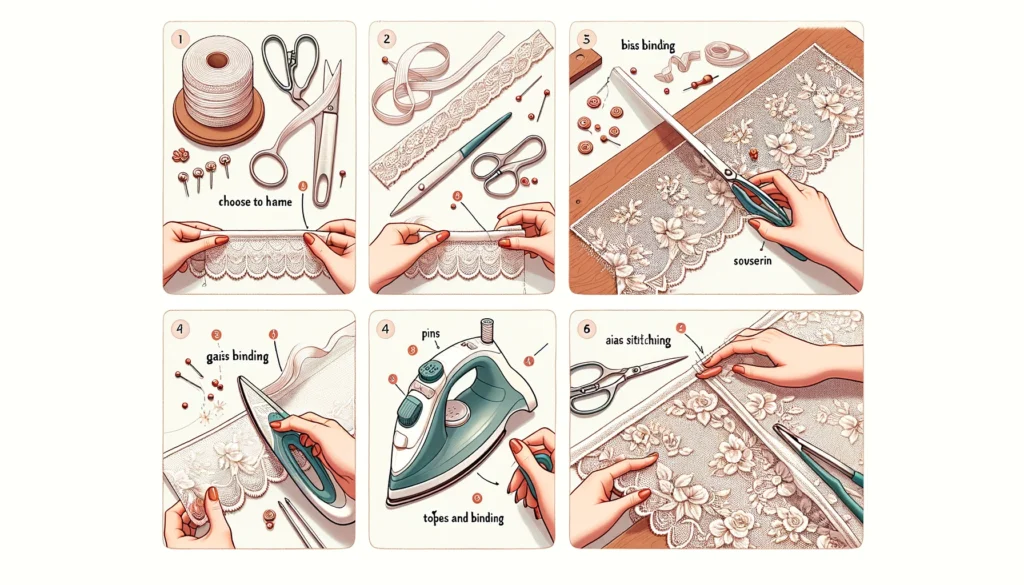
Pro Tips:
- Choose a bias binding that complements your lace fabric for a seamless finish.
- Practice attaching bias binding on a scrap piece of lace to perfect your technique.
Using bias binding is great for curved hems and gives a durable edge to your lace. With this method, you can achieve a neat and professional finish that enhances the beauty of your lace garment.
Tips and Tricks for Perfect Hems
Ironing Techniques: How to Press Lace Without Damaging It
Pressing lace is delicate work. Always use a low heat setting on your iron. Place a pressing cloth over the lace to protect it from direct heat. This prevents the lace from melting or becoming misshapen.
Gently press down without sliding the iron to avoid stretching the lace. If the lace has a lot of detail or embroidery, use a steam setting to relax the fabric without direct contact. For curved or tricky areas, use a pressing ham or sleeve roll.
Stitching Tips: Maintaining Thread Tension and Using the Right Needle
Keeping the right thread tension is crucial. Adjust your sewing machine to a lower tension setting to avoid puckering the lace.
Use a fine needle, such as a size 60/8 or 70/10, to pierce the lace smoothly. A lightweight, matching thread will help keep the stitches invisible.
If you are hand stitching, make small, even stitches. Practice on a scrap piece of lace to find the best tension and stitch size before you start hemming your garment.
Finishing Touches: Trimming Excess Lace and Checking for Loose Threads
After sewing, check your hem for any loose threads or uneven edges. Trim any excess lace close to the stitching line, being careful not to cut the stitches.
Use sharp fabric scissors for a clean cut. If you find any loose threads, tuck them back into the hem and secure them with a few small stitches.
Give your hem a final press to set the stitches and ensure the lace lies flat and smooth.
Frequently Asked Questions (FAQs)
Can Lace Fabrics Be Hemmed Using A Sewing Machine?
Yes, Use A Fine Needle And Lightweight Thread To Hem Lace Fabrics With A Sewing Machine.
How Do I Prevent The Lace Fabric From Snagging Or Tearing While Hemming?
Use Fine Needles, Lightweight Thread, And Handle The Fabric Gently To Prevent Snagging Or Tearing.
Is It Possible To Add A Lining To A Lace Fabric While Hemming?
Yes, Attach The Lining With A Sewing Machine And Hand Sew The Hem For A Clean Finish.
Final Thoughts
Learning how to hem lace can seem challenging, but with the right tools and techniques, it becomes much easier.
Whether you use hem tape, hand stitching, machine stitching, or bias binding, each method offers a way to achieve a professional finish.
By following the steps and tips provided, you can hem lace beautifully and confidently. Remember, practice makes perfect, so don’t be afraid to try different techniques to find what works best for you.
Happy sewing! Enjoy creating stunning lace garments with perfect hems!